
To add existing songs to SongwritersdB, you have two options:
- Add one or more songs at a time
- Add an entire folder of songs
NOTE: Acceptable audio files are .mp3, .wav, and .m4a only. If you have a song file in a different format, search online for “audio file format converter”; many are free and online, so you would only need to upload the file and then download the converted version.
To import one or more songs at a time but less than an entire folder of songs, you must use “Import Songs” on the Songs page (see below) to import songs from your computer (either from a local drive or synced cloud drive desktop folder such as is available with Google Drive, DropBox, or OneDrive).
To import an entire folder of songs, you can either use the above method or go to “Import Songs from Drive” on the Cloud Drive page.
Adding one or more songs at a time
Here are the steps to follow:
- On the Home page, click “Songs” in the left menu.
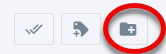
- Click the icon that looks likes a folder with a “plus” (“Import songs”) in the top menu…
 …
…
and this screen will open: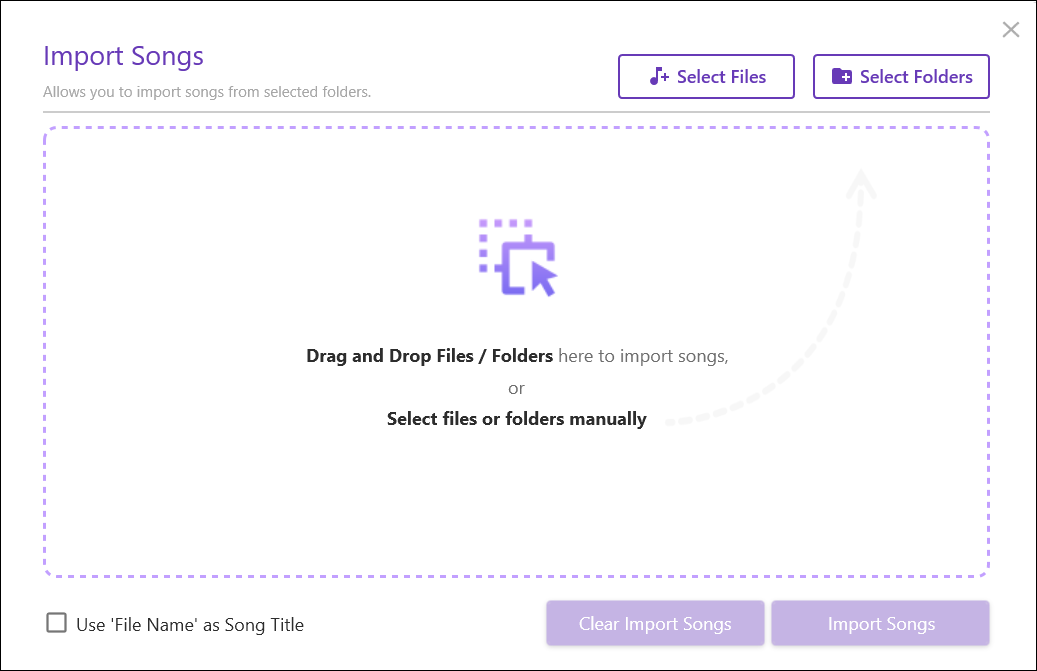
- To select one or more individual songs within a folder, open the folder on your computer and drag-and-drop the files onto the center of the screen. Alternatively, click “Select Files,” browse to the location of the file you wish to import, and then click on the song.
To select more than one song at a time, hold down the shift key and click on additional songs. - When you are ready, click “Open” and the selected songs will be visible on the next page. Here you can add more songs the same way. To delete a selection, click the X to the right of the file name. To delete ALL of the selected files/folders, click “Clear Import Songs” at the bottom of the screen.
- “Use ‘File Name’ as Song Title”: Check this box if you have already named your songs; otherwise, the file name will be the date and time you import the song. This can save you the trouble of having to re-enter the titles of the imported songs manually, after they are imported.
- NOTE: All selected songs must already be formatted as either .mp3, .wav, or .m4a! If not, they will not be imported.
- When you are ready, click “Import Songs”. Now, all of your newly imported songs will appear on the Songs page. To quickly view them, go to “Sort by” and select “Date imported”. The newly added songs will now appear at the top of the Songs page.
Adding an Entire Folder of Songs:
Via the Songs Page
Repeat steps 1 and 2, above.
- Click “Select Folders” and navigate to a folder with the songs you wish to import. You can select more than one folder at a time (shift-click).
- When you are ready, click “Select Folder” and all song files within the selected folders will be visible on the next page.
- To add one or more folders to the Import Songs page, just repeat the above steps.
- Alternatively, you can drag-and-drop one or more folders onto the center of the screen.
- To delete a selection, click the X to the right of the file or folder name. To delete ALL of the selected files/folders, click “Clear Import Songs” at the bottom of the screen.
- “Use ‘File Name’ as Song Title”: Check this box if you have a lot of songs with no mp3 metadata titles, but the titles are the same as the names of the mp3 files. This will use the mp3 file name as the title of the song. Otherwise the file name will be the date and time you import the song. This can save you the trouble of having to re-enter the titles of the imported songs manually, after they are imported.
- When you are ready, click “Import Songs”.
- NOTE: All selected songs must already be formatted as either .mp3, .wav, or .m4a! If not, they will not be imported.
- The newly imported songs from within the selected folders will now show up on the Songs page.
Via the Cloud Drive
You can also add an entire folder of songs from a cloud drive once you have made the connection to that drive (see below at “Cloud Backup”). The big difference is that you cannot select or omit indivia
- To do so, click the Cloud Drive icon in the main left menu, then click “Import Songs from Drive”.

- You will see a listing of folders within that drive: check the box next to the particular folder or folders that contain the songs you wish to import.
- Once you have all the folders you want listed, click “Continue to Download Songs.”
- Once the download process completes, the newly imported songs will show up on the Songs page.
Cloud-to-Cloud Transfer
A third alternative is to copy a folder full of audio files directly into the cloud drive folder SongwritersdB/Songs, and follow this with a Sync Manually on the Cloud Drive page, which will import all the songs into the desktop. This can be a real time saver if the source folder is on a cloud drive, thus saving you the time it would take to download into the desktop from the cloud and then upload back up to the cloud when you Sync Manually.\
Importing New Audio to an Existing Song
Click on the Import Audio tab within the Edit Song Details page. 
The file location of the current audio for the selected song will be displayed, here. To substitute a different audio file–or to import a new audio file for a song that has only lyrics–click the Browse button to find the audio file you wish to import (.wav, .mp3, or .m4a only). Double-click on the file name to import the audio into the song tile. (Note that the song name displayed in the song tile will not change, just the audio file.)
Save as New Version (Pro+ only)
Say you are recording a new song on your phone and after syncing it to the cloud you get an idea for a chorus or bridge, that you wish to connect or add to the song. What you can do is record the new section, title it with a related name (e.g., if the main song is “Joe’s Bar” save the new audio as “Joe’s Bar–bridge”), and sync to the cloud. Back at your desktop, be sure to Sync Manually first; then, on the “Joe’s Bar” song tile, click “Edit Song Details” and then “Import Audio.” Click “Browse” and look in the “Music/SongwritersdB Songs” folder on your computer, and double-click on “Joe’s Bar–bridge”. Then click “Save as new version.” Now, your bridge will be saved within the Joe’s Bar song tile as a new version (be sure to indicate this in the “Changes” text field, e.g., “BRIDGE”. (If you wish, you can delete the song tile “Joe’s Bar–bridge”, since it is now within the main song tile.)