
After a song is recorded, you can create a new version of the song as follows:
- On the song tile, click Edit Song Details and open the tab Record/Edit Audio.
- To record a completely new version, click record then “Save as new version”. (For additional information about this page, see “Adding New Audio” in the “Recording a New Song” tab, above.)
- As soon as you click “OK”, the Versions tab will open, showing your new song version.
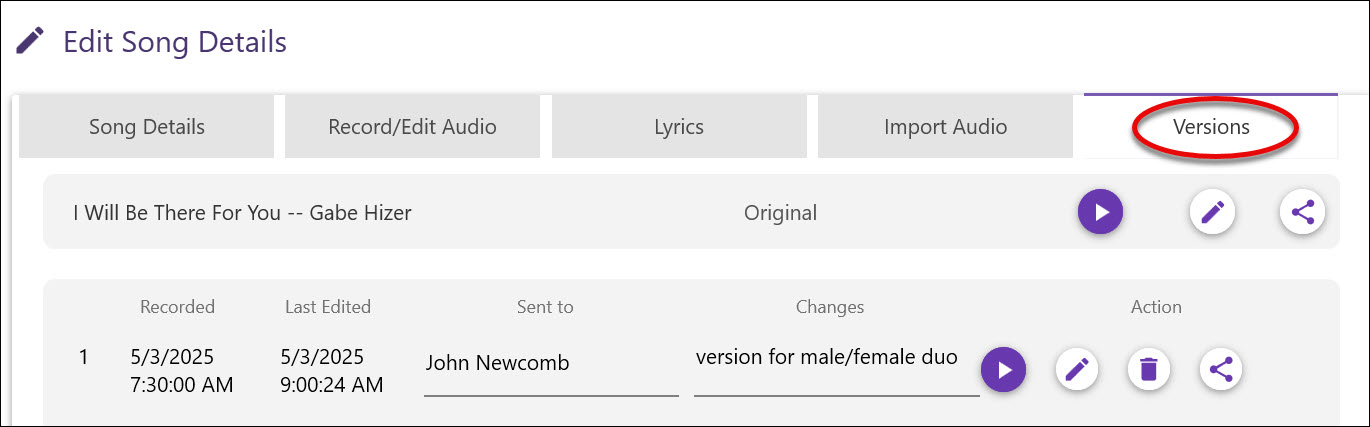
- Here you can audition the new version or share it with one or more people, entering the emails of the persons you wish to share it with, as well as typing in notes of what is different about this version. Later, you can see all information about what you shared, etc., in Share History, on the Cloud Drive page.
- If you click the Edit icon for a version, that version will open up in Record/Edit Audio, where you can record changes to the version.
- When you are finished making changes, you can either click Save, which will replace the version with the new audio, or click “Save as new version,” which will save the prior version as a new, additional version. On the Songs page, any song which has at least one Version will display the Versions icon:
Click the icon to open the Versions page for that song.
NOTE: To quickly find the last versions you created, go to “Sort by” on the Songs page, and sort by “Last edited on”.
To keep various versions of your song in one place, use the Import Audio/Save as New Version technique discussed in the Importing Existing Songs/ Importing New Audio page of this Manual.